
So you want to update the look of your tired old wood cabinets, but you don’t want the big spend of replacing them? Painting cabinets can be a fantastic answer to overhauling your kitchen or bathroom on a budget!
Like most projects, however, knowing the right way to paint your cabinets can make all the difference in how successful and long-lasting your efforts are. Following are tips I have learned along the way that will get you great results that you can enjoy for years to come!
At a high level, there are 3 P’s that need to be heeded to make your job a success… PROCESS,
PREPARATION and the right PRODUCTS
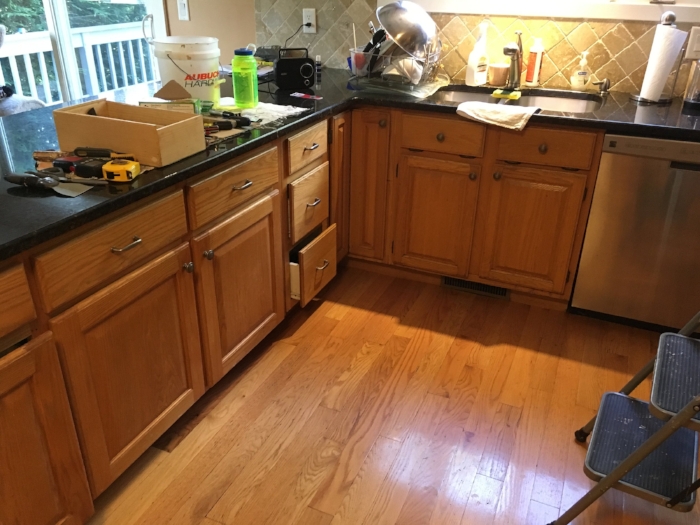
The first step in the PROCESS is disassembling your cabinets by taking off all of the cabinet doors and drawer faces --- but don’t start yet!! It may seem like it will be easy to put everything back – but it is essential that you know which doors and drawer faces go back where --- otherwise, you will create big headaches for yourself later on. First, make sure you have plenty of zip-top plastic baggies, a permanent marker and some masking tape. Then follow these steps:
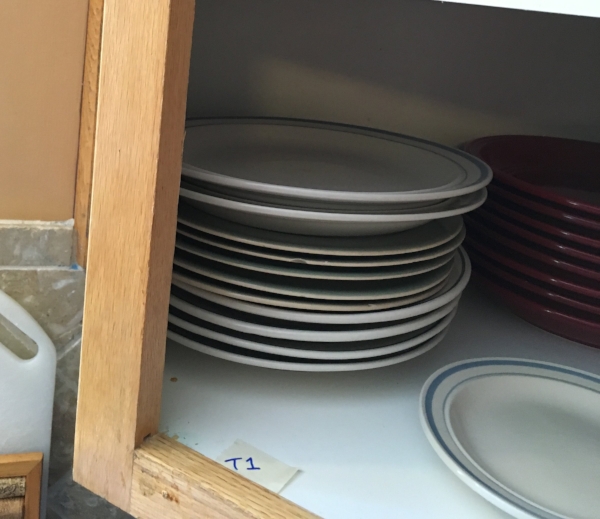
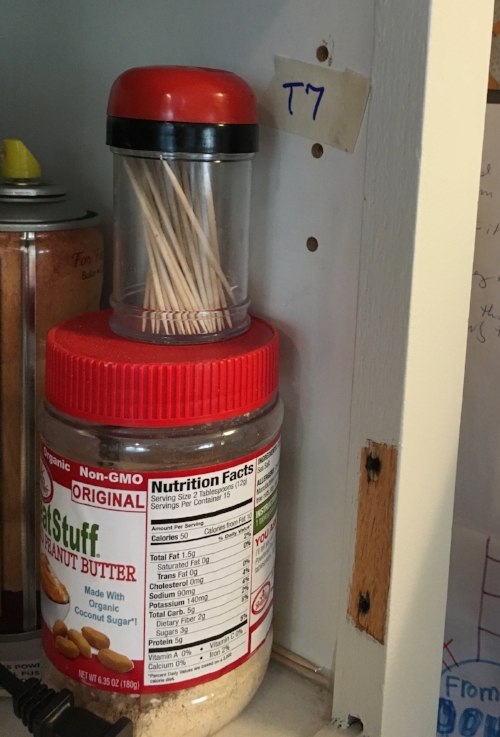
1) Inside of each door, put a piece of tape with a key code that is specific to that door/position. For example, I always start at the top, left-most door and call it “T1” for “Top, number 1”.
2) Before removing the door, mark with a fine-point sharpie where the tops and bottoms of the hinges are on the frames. You will use these marks later to align the hinges in the same exact position for re-hanging
3) Now take the door off by removing the hinges from the frame (they will still be attached to the door at this point)

4) As you take the hinges off the door, put tape on each one and mark it “T” for the top hinge and “B” for the bottom hinge. The hinges and ALL of your screws then go into a zip-top baggie labeled “T1” so you know which hinges and screws go with which doors. The handle/knob and associated screws for T1 also go into this same baggie.
5) Finally, label the cabinet door with “T1”. The best way to do this is to write it in sharpie on the inside of the door where the hinge gets mounted. That way, your writing gets covered up when you put the hinge back on (just make sure you don’t paint over it!).
Repeat this process for each door and drawer face. Each door and each drawer face gets its own code and baggie! The naming convention is not all that important -- as long as it makes sense to you and you don’t re-use any codes. I usually continue with “T2”, “T3”, etc on the top, then “B1”, “B2”, etc on the bottom and “D1”, “D2”, etc for drawer faces. I keep all of the baggies with screws, hinges and hardware together in one bucket and put that aside in a safe place.
OK – now you have a stack of doors, drawer faces and a bucket full of hardware-filled baggies. The next step takes you to PREPARATION – which starts with CLEANING. Yep – it is not glamorous, but it is absolutely essential. Paint does not stick to dirt or grease – so if you just paint over it, your paint will crack, peel or chip off. Adding to this, cabinets by nature have way more dirt and grease than normal painting projects – so don’t use any past success you may have had painting without cleaning as your guide! For this cleaning step, I use a heavy-duty degreaser called TSP – which is specially formulated to remove grease and dirt for painting. Because you want to paint a clean surface, I usually start with the frames and go right to the next step of sanding and priming – and THEN move on to cleaning the doors. When cleaning the doors, you will often need a scraper to take off heavy residue and/or old adhesive bumpers.
You are not done with PREPARATION yet! A clean surface is essential, but paint also does not stick to the shiny surfaces you will have on your original cabinets. To address this, the next step is sanding. I use 220 grit sandpaper on a sponge sanding block and start with the frames. Since you only need to dull the surfaces (not actually remove the finish), I hand-sand everything. You want to sand in the direction of the wood grain and make sure you hit all surfaces. You can check your work by looking at your surfaces at an angle in the light – this will show you what is still shiny, and what is now nice and dull for painting.
Ready for paint?! Not yet!! There is still more to the PROCESS. Now you have dust from sanding all over your project – so you will need to vacuum it off with a brush attachment and make sure your surface is dust-free.
Now, we are on to the importance of the type of PRODUCTS you use --- starting with the right PRIMER. Primer covers any knots or blemishes in the wood, but more importantly, it acts as a bonding agent to make sure your paint gets good, hard adhesion for long life. You will want to use a bonding primer for this; my favorite is a product by INSL-X called STIX that you can pick up at any store that sells Benjamin Moore products. If you are painting your cabinets a medium or darker color, have your paint store tint the primer to get it as close as possible to the final paint color. The primer will never actually match the exact paint color – but the closer you get it, the better your paint will cover the primer (a dark color paint over white primer is a big challenge!). To apply the primer and paint, I use a 1.5” high-quality angled brush to cut in the edges, and then a mini roller with a mohair blend roller sleeve to get a nice smooth rolled finish on the flat surfaces. When applying primer, make sure you don’t let it drip or glop up anywhere – you want your surface to be as smooth as possible. Prime all surfaces you will want to paint (both sides of doors, faces and edges of frames). When priming the edges of frames, paint right up to your thin sharpie lines for the hinges so you know where to re-hang the hinges when you are done. Likewise, do not cover the code on your doors and drawers as you will need that to be readable when you reassemble!
Paint around where the hinges go!

And paint around code on door (it will be covered by the hinge!)
Let your primer dry – and then you get to sand again! This is a light sanding to smooth out any brush marks or drips that also helps the paint bond to the primed surface. And of course, now that you have sanded – you need to vacuum again!
OK – NOW we get to PAINT. Choosing the right paint may be the most important step of all in this process. A regular satin or semi-gloss trim paint won’t be smooth or hard enough to get you a good cabinet-grade finish. I recommend a urethane acrylic paint or a waterborne alkyd paint. These give you the nice smooth leveling and hard finish of an oil paint, but the faster drying time and low fumes of a water-based paint. My favorite is a product called Cabinet Coat by INSL-X, which can be purchased anywhere Benjamin Moore products are sold. The only limitation of Cabinet Coat is that you can only get it in light colors. For darker colors, I use Benjamin Moore Advance (Advance takes longer to dry and can be a bit trickier to use than Cabinet Coat, but it creates a beautiful finish!). In either paint, I always use a satin finish – which gives you great washability but does not highlight flaws as much as semi-gloss or gloss paints will do.
When applying these types of paint – you want to do it in nice, thin smooth coats. You will have to do 2 coats anyway – so remember that 2 thin coats are much better than trying it in one thick coat! Again, I use a high-quality brush to cut in the edges and a mohair blend mini-roller for the flat surfaces. When loading the roller, make sure you don’t get too much paint on the roller as you don’t want to get the “orange-peel” look that can result.
Let your first coat dry overnight (read instructions on your paint – some paints need 16 plus hours before re-coating!). Before applying your second coat, you will want to do another light sanding! This is important for bonding purposes – you definitely want your second coat to stick to the first coat!
OK – you are almost there!!! If you can, it is best to give your newly painted surfaces a couple of days to cure before re-assembling your cabinets. Once you are ready to put everything back together, you will be very happy you followed this PROCESS. Using your coded baggies, put the hinges back on the corresponding doors, and then hang the doors where you have your hinges marked….
And enjoy what looks like a brand-new room!

Before

After
Before

After

Before

After